Installing AudioFile 2.0
Server
This document will demonstrate how to properly install the newest version of AudioFile 2.0 Server on your workstation or server. Creating a "Data" or D: partition would be beneficial in keeping your audio data separate from any Windows system files.
Double clicking the "SetupKlzAudioLogger64.exe" shortcut
(below) on your desktop will launch the signed
Windows installer package.
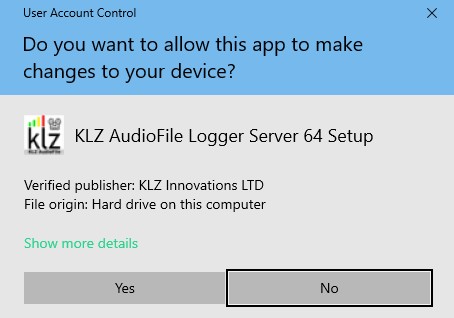
Click "Yes" to
begin the install process.
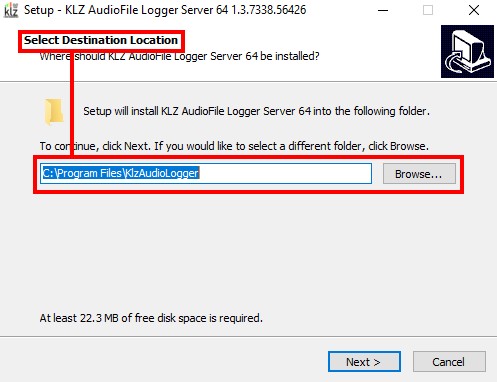
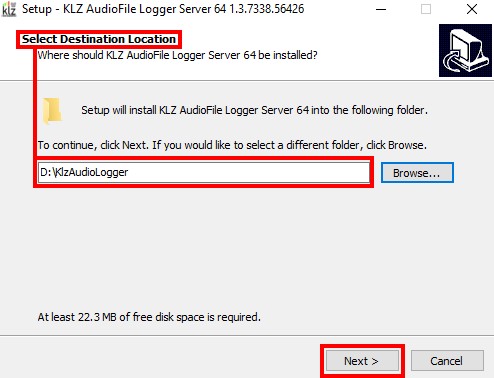
By default, Windows will expect you to
install most software to it's C:\Program Files directory. We will be
installing the AudioFile 2.0 Server on our D: partition. Click the
"Browse" button to select our custom destination.
Scrolling through the system, locate, and choose the D:
drive. Then click Ok.
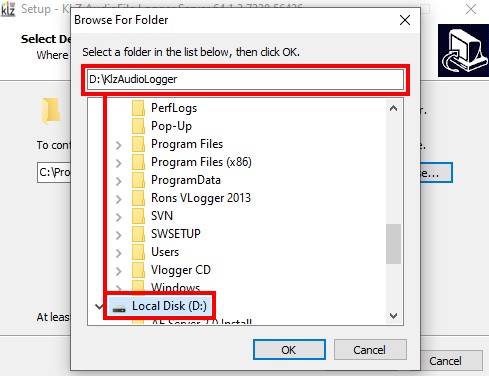
The name of the installation folder will be appended to
the root of the destination drive (D:) automatically. Click "Next".
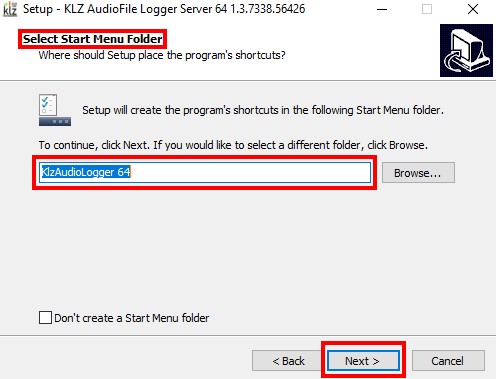
At this point we can simply accept the defaults. Click "Next"
to continue.
Click "Next" again to continue.
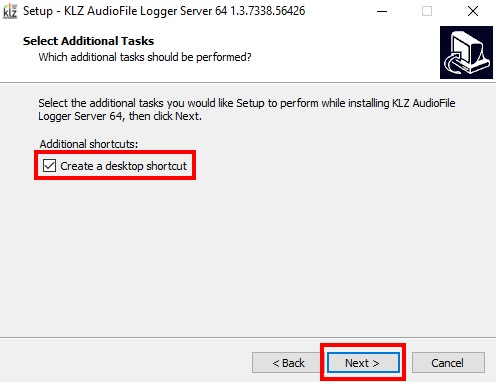
Choose the "Create a desktop shortcut" box and click
"Next" to continue.
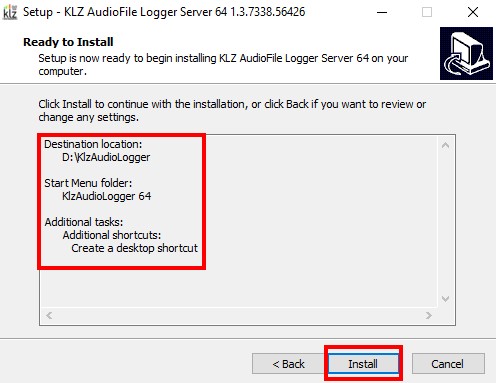
Here we can preview the installation settings
in detail. Click "Install" when ready.
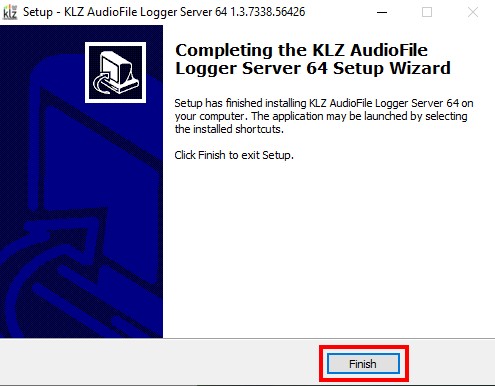
The installation has completed. Click the "Finish" button to
exit the setup
.
Registering Your New AudioFile 2.0 Server Software License
Now that AudioFile 2.0 Server is installed on your pc or
server, we need to register your license in order to start any
configuration setup. To obtain a valid license file, or activation code for
your system, you'll need to send in a manual license request via
e-mail to This email address is being protected from spambots. You need JavaScript enabled to view it.. Let's take a
look at this procedure below.
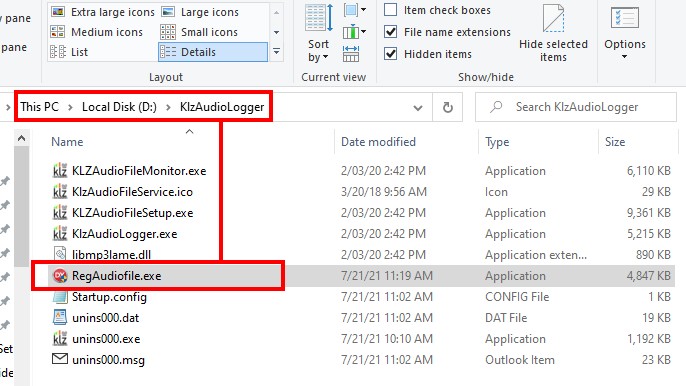
Locate the "RegAudiofile.exe" file in
your new install directory. R. click, and choose "run as
administrator".
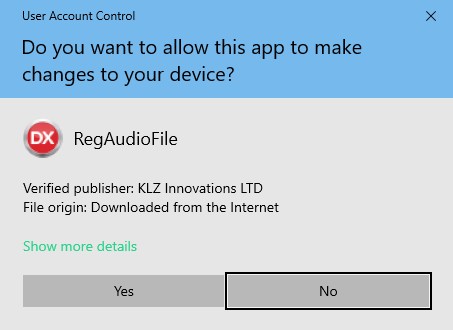
Click "Yes" to begin the procedure.
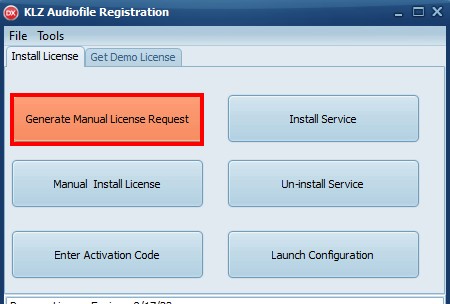
Click on the "Generate Manual License Request" button as seen below.
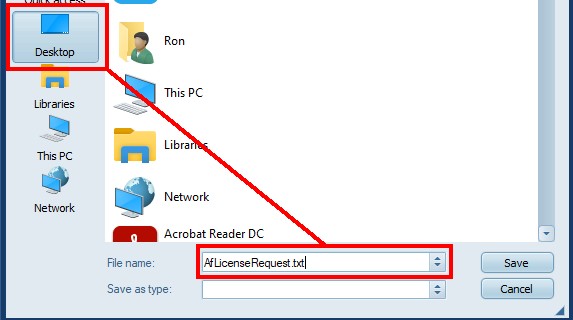
The request file should offer to save to your desktop, or downloads directory. Make note of the location of the saved "AfLicenseRequest.txt" file.
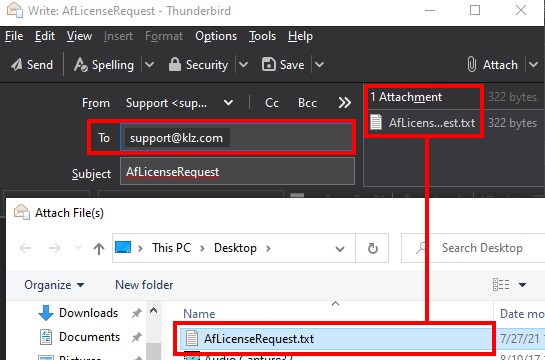
Next, attach the text file in your e-mail to KLZ support,
as seen below. You will promptly receive your license from us via
e-mail as well.
After you have received
your new license or activation code from KLZ, there are 2 ways to license your
AudioFile 2.0 Server. One is by "manual Install", and the other is by
"activation code". Let's take a look at the following options
below.
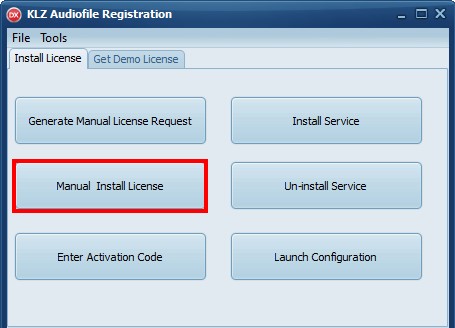
Option 1: Choose, and click the
"Manual Install License" option, as seen below.
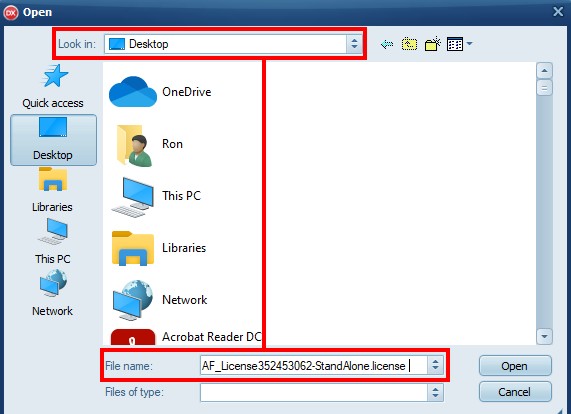
Navigate to the location of your license file. In this
instance we've placed it on the desktop. Choose the license file, and
click "Open" to install.
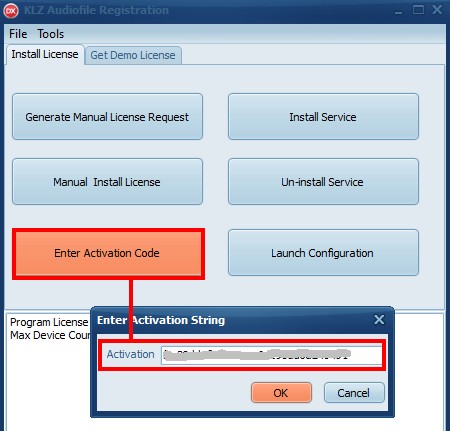
Option 2: Choose, and click the "Enter Activation Code" option, as seen below. Paste your code into the activation field, and click Ok to install.
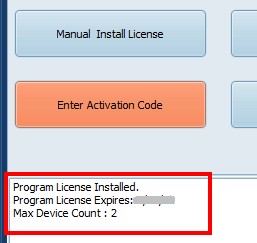
When either of the two installation methods have been successfully run, you'll receive a message (below) in the note field confirming installation along with your maximum device (stereo channel) count. You are now ready to configure your AudioFile 2.0 Server, and begin logging.
Configuring The AudioFile 2.0
Server
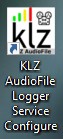
With the installation, and license activation now completed, it's time to configure the AudioFile 2.0 Server for primetime. To begin, double click the "KLZ AudioFile Logger Service Configure" shortcut (below) on your desktop to launch the config dialog.
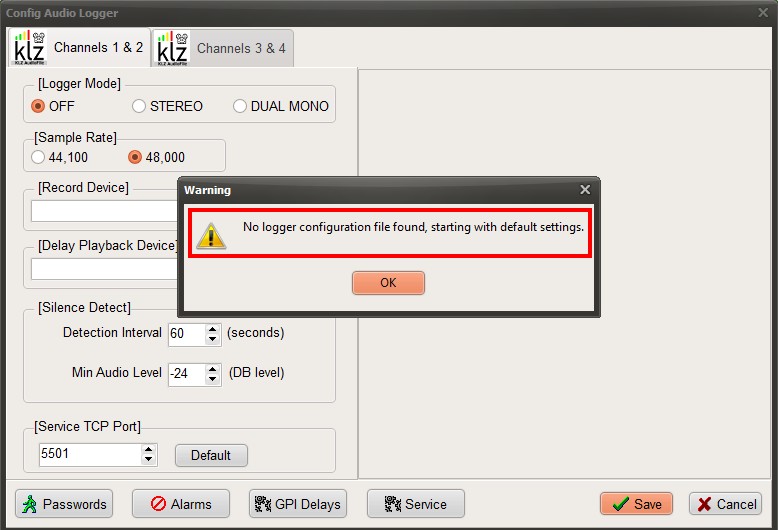
With the config dialog now open, we are greeted with a
warning that no configuration file could be found. This message is
harmless, as we are configuring a brand new installation. Click Ok to
begin.
Here we are presented with two main
channel tabs that can be configured as 2 stereo, or combination of
dual mono. The config dialog also contains multiple input fields for
customization. Let's explore the main config page settings below.
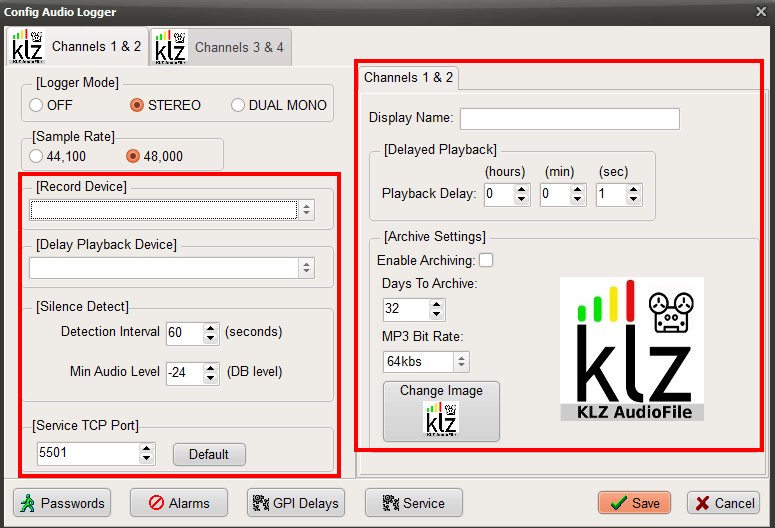
- Logger Mode: Choose Channel Off (Disabled), Stereo, or Dual Mono
- Sample Rate: Choose between 44.1 or 48KHz Linear PCM
- Record Device: Choose your audio record device/source (internal or external)
- Delay Playback Device: Choose your playback device/source
- Silence Detect: Set the timing and level for silence detection
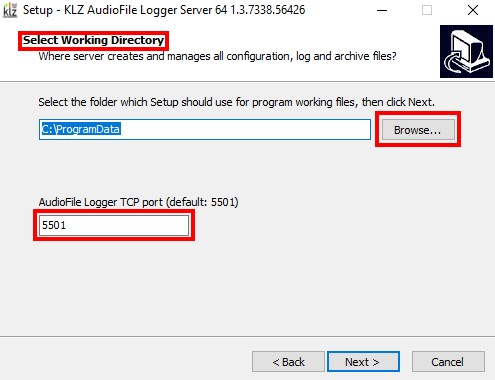
- Service TCP Port: AudioFile Server communicates over TCP on port 5501
- Channel Display Name: Enter your station ID or call letters in the display field
- Delayed Playback/Playback Delay: Set your playback delay preference in hours, minutes, or seconds
- Archive Settings/Enable Archiving: Checking this box will begin the archiving process upon starting of the service
- Days To Archive: Set the amount of days to archive
- MP3 Bit Rate: Choose the bit rate ranging from 32Kbs to 320Kbs
- Change Image: Use the default KLZ image for channel display, or choose your own custom bmp, jpg or png file
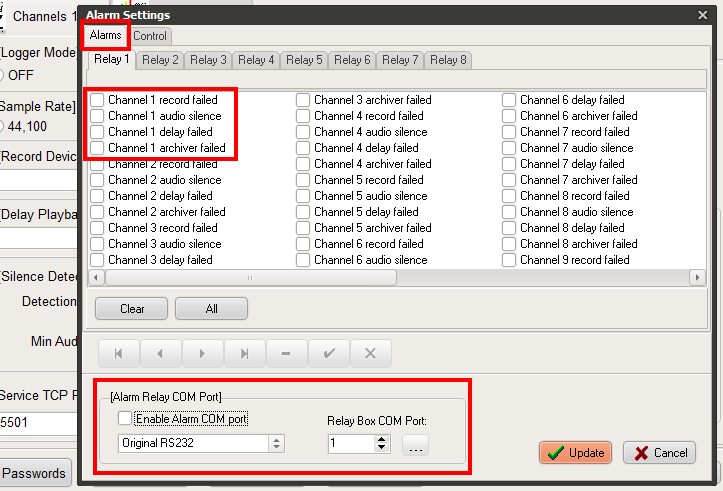
The "Alarms" tab allows you to select options for
various channel failure scenarios.
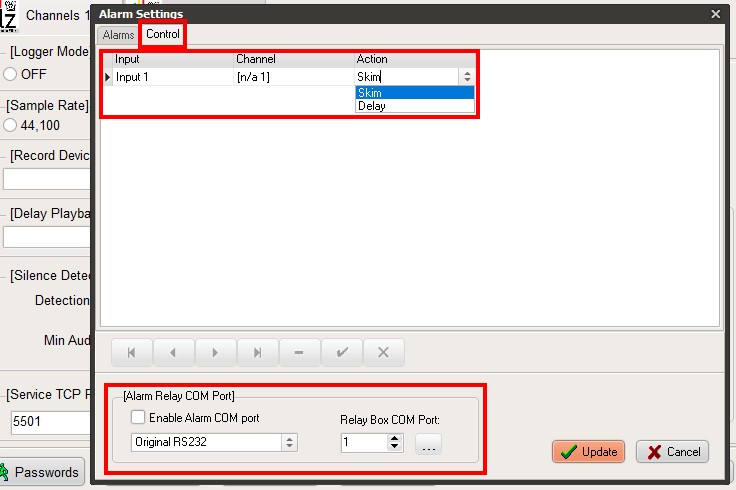
The "Control" tab allows you to input custom delay
settings, or mic skims for on-air talent quality checks. An I/O relay
box (available from KLZ) is required for mic skimming.
Once your configuration is set and saved, you'll need to start
the KlzAudioLogger service. This can be done through the Windows management
console, or within the AudioFile 2.0 Server's main config page. For the Windows
management console, R. click "This PC" on your desktop, and choose "Manage".
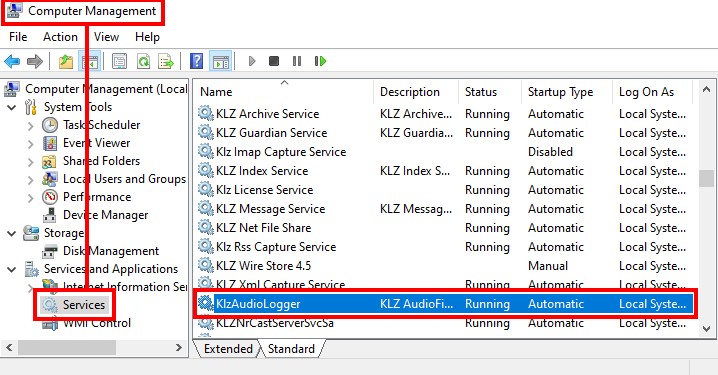
With the console open click on "Services" in the left hand tree. Scroll down to
find the KlzAudioLogger service, and click the start button on the
top toolbar.
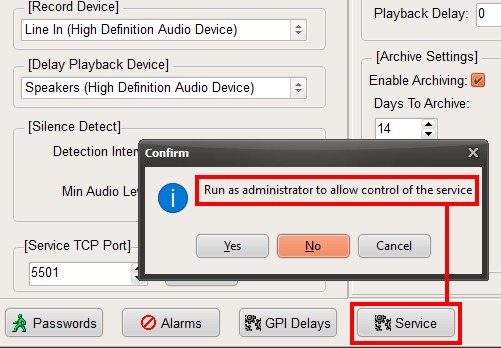
With the AudioFile 2.0 Server's main config dialog open,
click the "Service" button on the bottom left toolbar of the config page.
You are prompted to control the service as an administrator. Clicking
'Yes' will allow you to do this.
With the "Service Control" dialog open, you can now Stop and Start the KlzAudioLogger service as you need.
