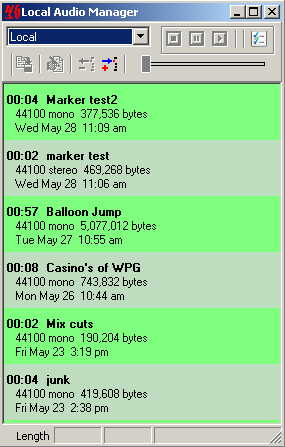
Your Local Audio Manager allows you to not only store audio in lists that you've created, but also lets you import, export, preview, play or edit your clips.

Creating a new audio list:
To create a new local list in your Audio Manager, click on Tools in the top main menu. Select Create Audio List and you'll see a dialog box prompting you for a list name. Simply enter a name for your new audio list and click OK. You receive an info dialog telling you that your playlist was successfully created.
Click OK and go to the Local Audio icon on your toolbar to open the audio manager, and your new list. Use the drop-down window to choose the list, then click the import tool button to bring a new audio clip into your list. The Import Audio File dialog lets you browse your computer or external device for any existing audio, whether it be in .Wav or .Mp3 format. Just choose your clip and hit open. Your clip is now viewable in the list.
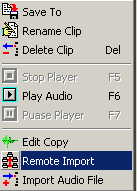
Focusing on the clip with a left click hi-light your Audio Manager's toolbar ... allowing you to save it to another location, rename it, delete the clip, or import another new clip. Focusing on the clip with a right click offers you a fly-out menu (see below) with a few extra choices, that being the ability to open your clip in an audio editor, or remotely importing a clip from the main hub site.

Setting a Default list:
Now that you've likely created more than one local audio list for yourself, you just may decide to make one of them your 'default' for convenient saving. To do this, simply go to Tools on the main menu and select 'Set Default Audio List'. This prompts you to select a default list from the dialog drop-down menu. Select a list and press 'Set'. Now open your Audio Manager and you'll see your new Default list.

